
Birdhouses
Overview
Using wood and woodworking tools students will create birdhouses. This project will allow for demonstrative and hands-on instruction that will aid in supporting the “Big Ideas” within the Applied Design, Skills and Technologies curriculum, as well as incorporating elements from Math, Art and Social Studies curriculum.
Rationale (Why we are doing this?)
To allow students the opportunity to use tools and material that many have never seen before. By allowing students to explore and create through a hands-on approach allows for greater student engagement in their learning. As well the process of creating something 3-dimensional allows for the students to develop their problem solving skills.
Materials/Resources
- Pre-cut wood slats (preferably cedar or some other soft wood)
- Hammers
- Nails
- Wood Glue
Context and Background Knowledge
Students will need basic safety instruction on how to hold a hammer and hammer a nail. An understanding of geometric shapes and how they will need to be placed in order to stay together needs to be examined.
Curricular Connections (Competencies and Content)
| Make a product using known procedures or through modelling of others | (ADST-3) |
| Identify how their product contributes to the individual, family, community, and/or environment | (ADST-3) |
| Measurement using standard units and following patterns | (3-Math) |
| Refine processes and technical skills in a variety of art forms | (3-Arts Education) |
| Interconnections of cultural and technological innovations of global and indigenous peoples ie. shelters, buildings, tools and building technologies | (3-Social Studies) |
Explore + Understand + Create (Key elements/Lesson Design/Format)
Prior
- Purchase and cut the lumbar into desired dimensions and drill a hole in the front piece of the birdhouse.
- For ease of distribution have these pieces bundled together in a kit, 1 per student.
Method
Method
- Take your first side and slather carpentry glue onto the long side of the piece.
- Line this piece up against the back piece of the birdhouse.
- Using 2 nails, nail the back to the side.
- Repeat the process for the second side.
- Add glue to the shorter lengths of the side pieces and using 4 nails attach the front to the sides.
- Turn the birdhouse upside down, apply glue and 4 nails to attach the base to the main frame.
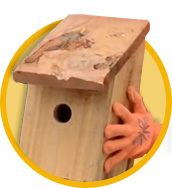
- Turn the birdhouse right side up, apply glue and 4 nails to attach roof to the house with a slight overhang in front.
Applications/Adaptations/Extensions
- Students can use their own technique for building their birdhouses and/or try another method after completing the first house
- Creates a sense of community and collaboration by enlisting the help of local high school students
- Students can help each other at different stages
- Incorporate procedural writing and write the steps for making a birdhouse
Special Notes
- In order to facilitate this project it would be beneficial to ask for help from your local high school woodworking teacher. We had 7 students come to our school for two mornings from 9-11:30. They worked one-on-one with students and were able to assist in making 43 birdhouses.
- I was able to have off-cuts of cedar donated by lumber mills. I had to go and salvage the material on my own. If you are not interested or able to do this I would suggest charging $5.00 per student to cover the cost of material. You can easily make this project with a five foot length of a 1×6 piece of lumbar.