
Making a Tetrahedral Kite
Overview
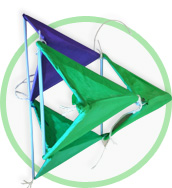
Students will make a Tetrahedral Kite and explore the forces that keep it aloft. They can further refine their design to maximize the lift created and minimize drag.
Rationale (Why we are doing this?)
Students will have a concrete demonstration of force and gravity and will gain insight into the effectiveness of aerodynamic design.
Materials/Resources
- Light string or heavy thread
- 24 drinking straws (8″)
- 2 sheets of wrapping tissue paper (or foil tissue paper)
- scissors
- transparent tape or glue
Context and Background Knowledge
Students must be able to tie tight knots.
Curricular Connections (Competencies and Content)
| Newton’s 3rd law | (Grade 6) |
| balanced and unbalanced forces | (Grade 6) |
| Gravity | (Grade 6) |
| Triangles and pyramids | (Grade 6) |
| Identify and use appropriate tools, technologies, and materials for production | |
| Make a plan for production that includes key stages, and carry it out, making changes as needed | |
| Use materials that minimize waste |
Explore + Understand + Create (Key elements/Lesson Design/Format)
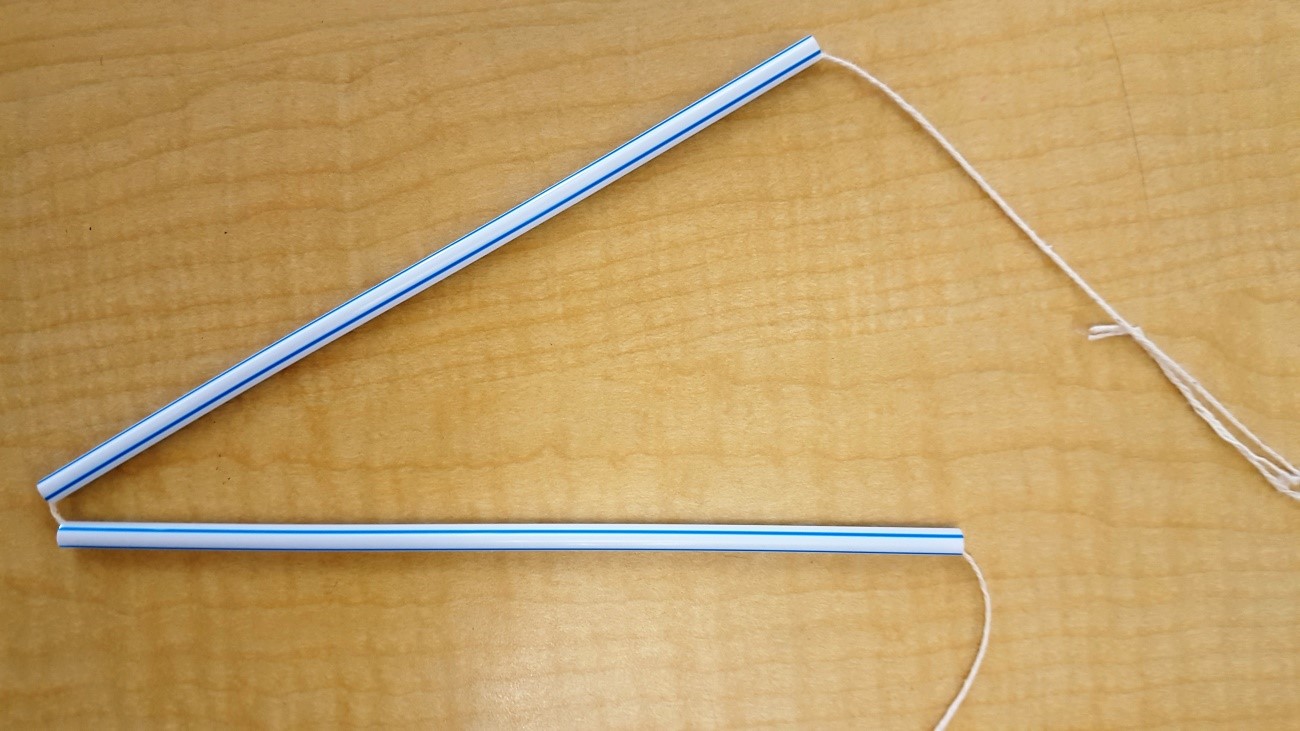
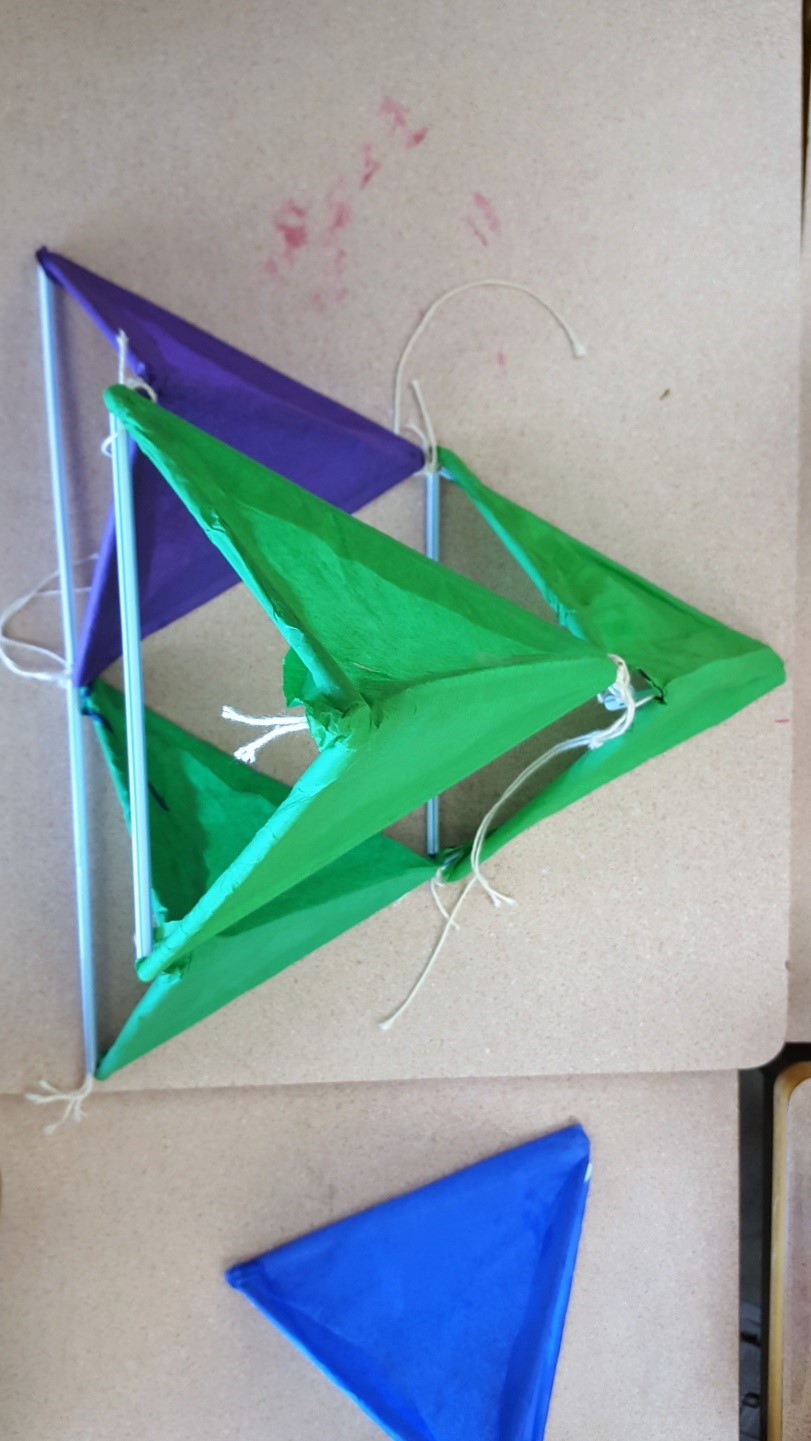
- Take 3 straws and feed the string through all of them. Be careful not to bend the straws in any part of this process. This greatly weakens the straws and the kite may collapse in a strong wind.
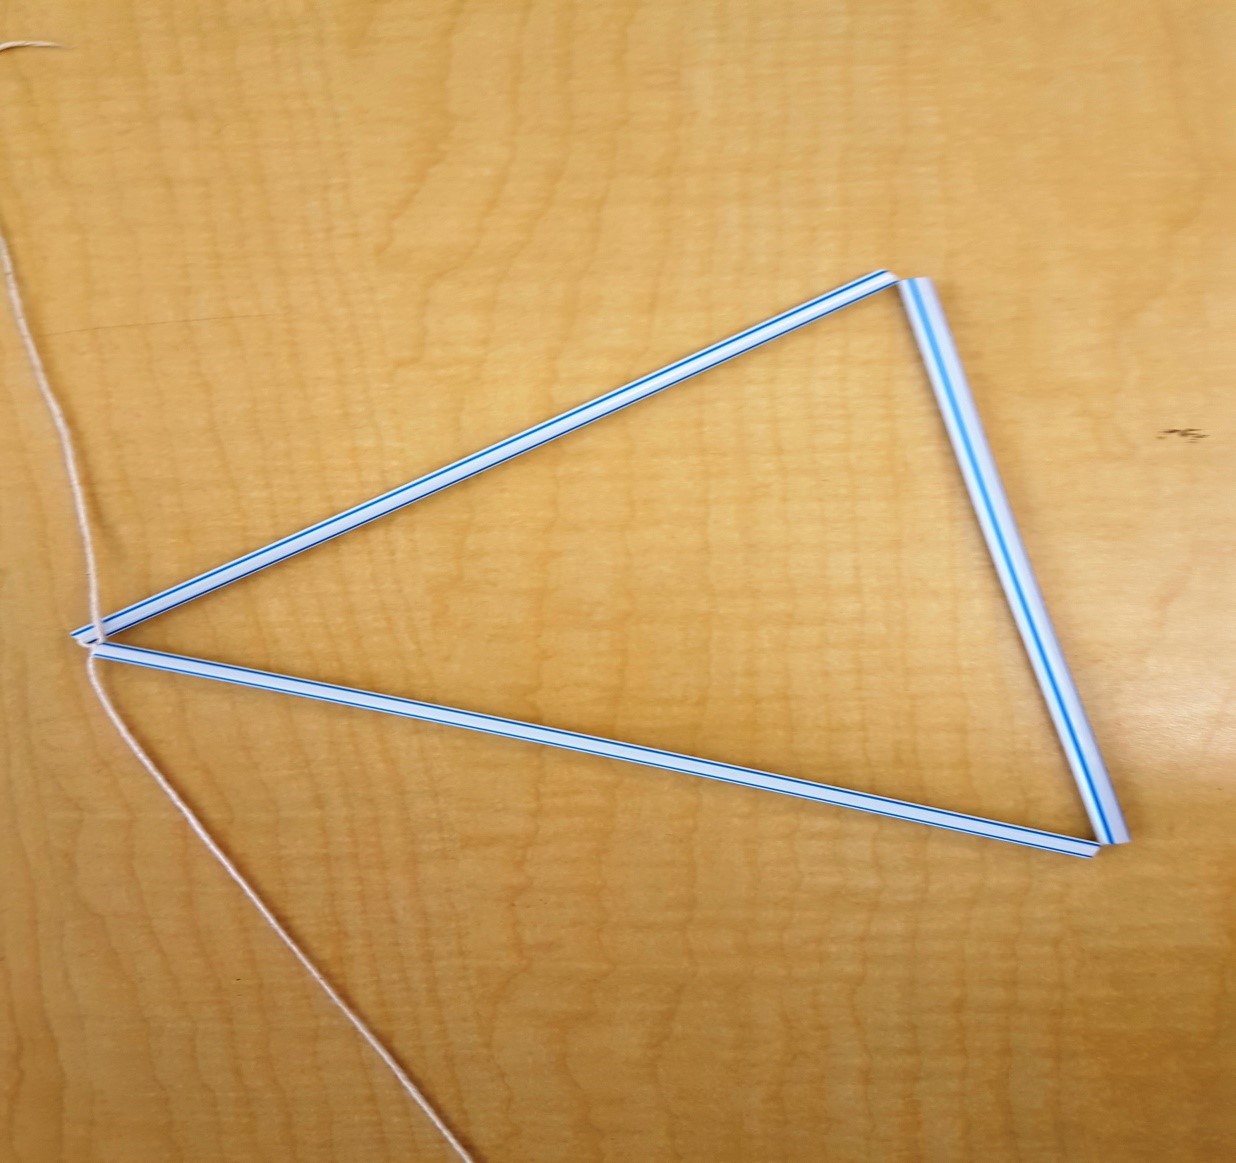
- Tie the ends of the string in a tight not. This should form a triangle. Be sure to make the joints tight and leave extra string at the end for later.
- Tie a piece of string to one of the open ends of the triangle. Make sure the string is long enough to feed through a straw.
- Feed straws over both of the pieces of thread now on the triangle.
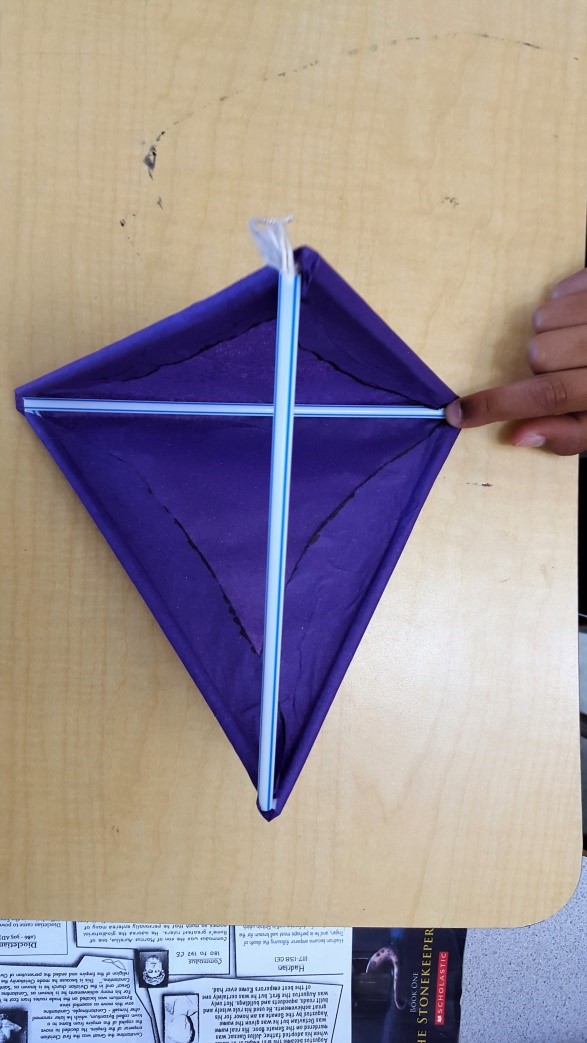
- Tie the ends together to make the shape below. There should only be one straw in the middle of the diamond!
- Tie a piece of string to the opposite end of the diamond that has no thread. Use enough string to feed through a straw.
- Feed a straw over that piece of thread.
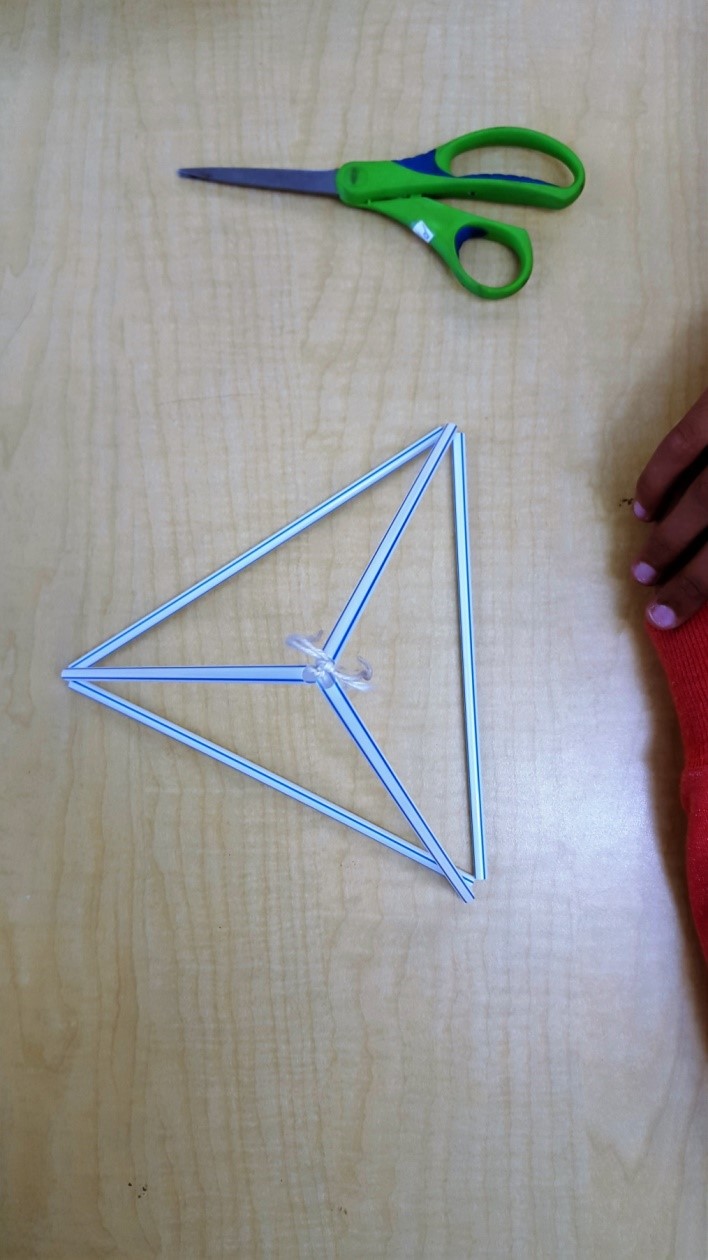
- Tie that string to the opposite end of the diamond to form a tetrahedron. (Make sure the joints are tight and leave the excess string for later.
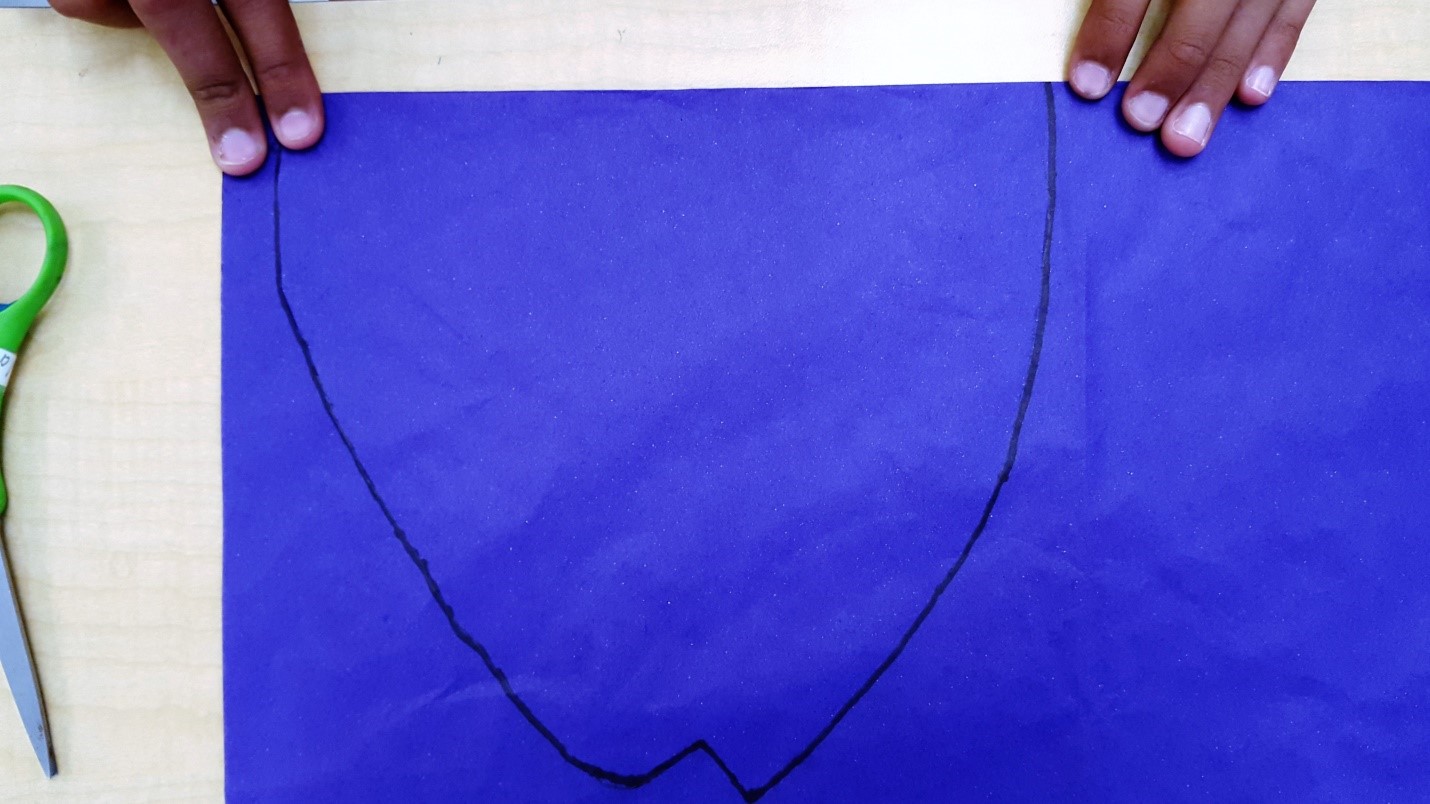
- Using the “fish head” template, trace the shape onto a piece of folded coloured tissue paper, then cut it out.
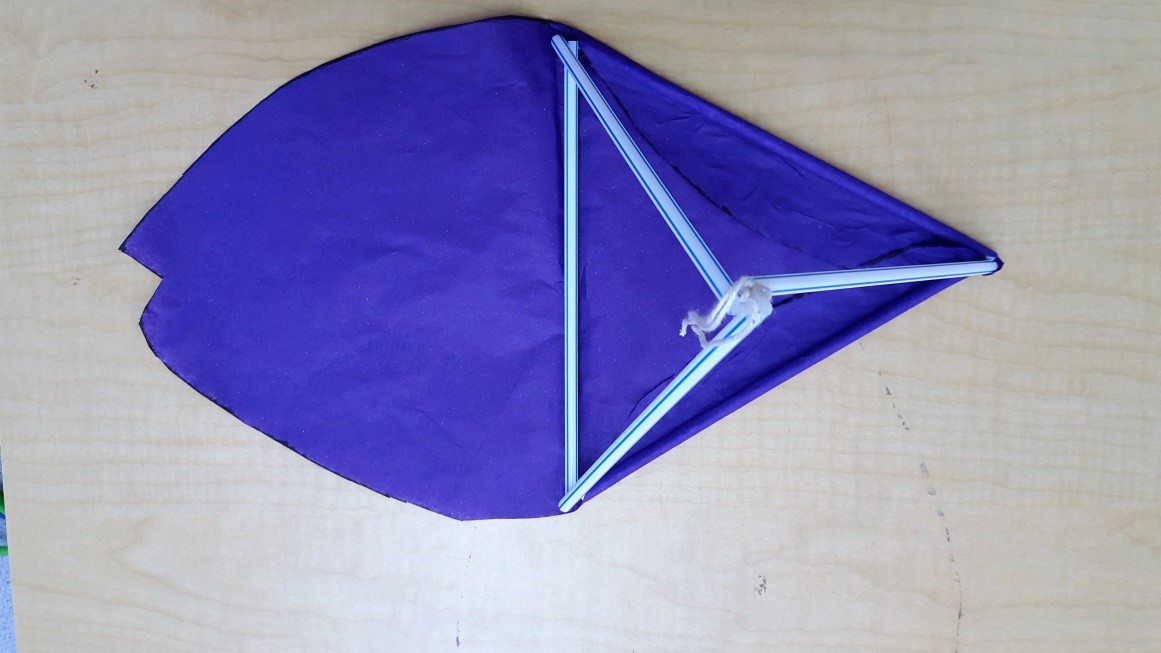
- Place a cell onto the middle of the cover so that one straw rests in the middle of the pattern.
- Curl the edges of the tissue paper around the straws and secure them using glue or tape. Repeat this process with the other half of the tissue paper as well. When you have finished, two sides of the tetrahedral kite will be covered and two will remain open.
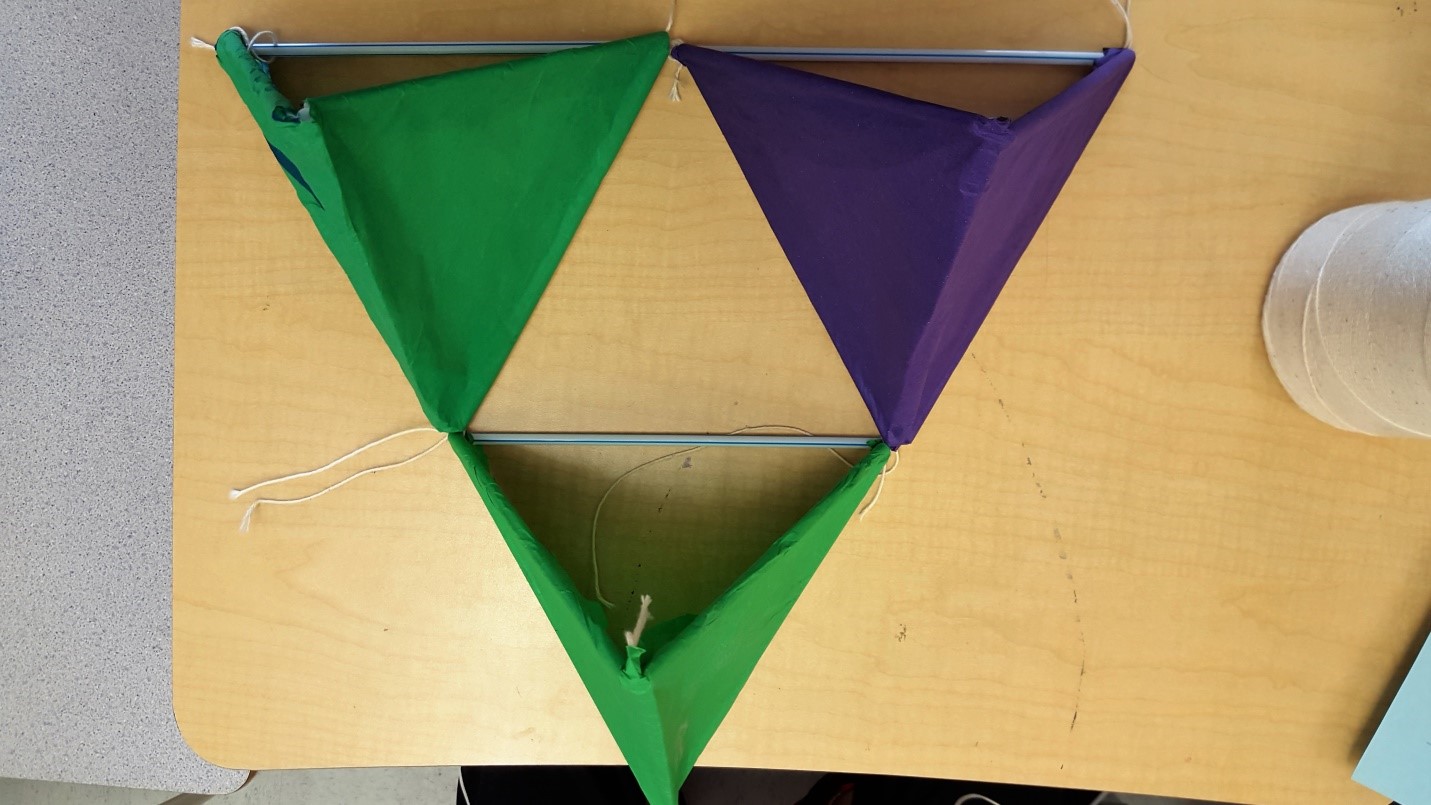
- Repeat all of the steps in this process three more times in order to create a total of four tetrahedral cells.
- Create the base of the kite by tying three of the cells tightly together. Ensure that sides covered with tissue paper are facing the same direction.
- Complete the kite by securing the final cell to the top of the base with tight knots.
- Finally, create a bridle for the kite by creating a loop of string the passes under and around the middle of the tissue paper of the final cell. Tie a long length of string to this bridle. Then head outside to try out your kite!


Special Notes
- Students must be very careful not to damage any of the straws during construction.
- Students may wish to add a tail to stabilize the flight of their kite.

Derek Cockram
Over the course of my 15 year teaching career, I have taught in public and private schools in Ontario, BC and abroad. I am passionate about literacy, technology and project based learning.
email: dcockram@hotmail.com
school/site: Taylor Park Elementary
grades taught: intermediate
website/blog: http://derekonline.weebly.com/